
 the key")

But to do it well means the tools have to be not only excellent but also easy to operate. Founded in 1956 by Major R.N. Gatehouse and Ronald Brookes it is no surprise that 65 years later B&G can claim more experience than most...
Sailing by the seat of your pants while using the Mk1 eyeball method of assessment is all very well but when the land, seabed or any other physical obstructions become tactical factors, there are more accurate and effective methods for making the right call. As a committed racer himself, B&G’s product director Matt Eeles knows this well and offers some of his tips and tricks on how to get the best out of B&G instruments.
His starting point is calibration where he is quick to stress that before you start the process, the very first thing to do, (but one that is often forgotten), is to make sure that the log impeller is clean and not fouled. Inaccurate data here will simply multiply errors further down the line. From there, using the calibration function on the H5000 provides a simple guide to setting up the log and involves making three passes over a known distance.
‘There are a number of ways that you can carry out the runs. First you need to make sure that you are running directly up and down the tide. Then, using the chartplotter find two points like channel markers that are around 0.5 miles apart, measure the precise distance between them and enter the distance into the calibration function on the H5000.
‘It doesn’t matter whether you start your first run into the tide or down tide, but what is important is to maintain constant engine revs and speed at each of the ends of the run by making a nice wide turn at each end to keep the same pace.’
Calibrating the compass is the next item on Eeles’ list. Things like tidal flow, true wind speed and angle and many other calculated functions rely on good heading data. Fortunately, as with boatspeed, following the instructions on the H5000 makes this a straightforward process.
Compensating for any misalignment of the wind vane is the third key area of calibration. ‘Ideally it is best to perform your calibration runs when there is no wind and no tide,’ he says. ‘Of course, this isn’t always possible, but the more accurate you can get the alignment of your wind instruments, the better. Achieving more accurate lay-line data is one example of gaining a potential advantage over your competitors by knowing when you will be able to clear headland or a sandbank.
‘Sail selection is another example, particularly for those sailing shorthanded where changing sail might take longer and be a bigger deal than for a full crew.
‘Accurate windvane alignment usually means placing your boat head to wind using the Windex and then seeing if your instruments match up. There is an element of judgement involved in this, but if you also compare the readings you are getting from tack to tack for apparent wind angles you should be able to build a reasonably clear picture on whether any adjustment is required. ‘There is an auto-calibrate function on the H5000 which guides you through the process where you steer to the luff of the jib while sailing at a constant speed. A quality indicator monitors how steadily you’re steering so that it knows when the wind data it’s logging is good.’
Having set up the three key areas, your calibration process can then start to focus on any local effects such as upwash from the mainsail by modifying the offset table. ‘This process takes longer because it relies on careful observations from tack to tack. The calibration offsets are gradually adjusted by small increments once you are sure of the validity of the data.’
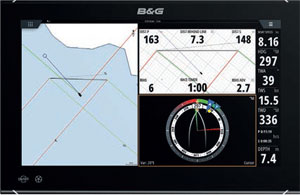
Aside from calibration and with coastal racing in mind, one of Eeles’ favourite tricks for pre-race preparation is to mark-up exclusion zones on the chartplotter. ‘The easiest way to do this is to consider the boundary of the exclusion zone as a route and enter the key corners as waypoints,’ he explains. ‘Then, if you set these waypoints as a route, the chartplotter will display them as the boundary. I also do this for setting long start lines, especially if it is impractical to ping the line. It’s something you can set up before the race by defining the line as a route either with the coordinates, or using a range and bearing from a particular point.
‘But one thing to remember is to enter an offset to allow for the distance between the bow and the GPS antenna, which in most cases will be the length of the boat.’ Omit doing this and you’re straight back to the Mk1 eyeball.
Click here for more information on B&G »
We invite you to read on and find out for yourself why Seahorse is the most highly-rated source in the world for anyone who is serious about their racing.
To read on simply SIGN up NOW
Take advantage of our very best subscription offer or order a single copy of this issue of Seahorse.
Online at:
www.seahorse.co.uk/shop and use the code TECH20
Or for iPad simply download the Seahorse App at the iTunes store